So, leaving behind the verbosity again (I hope); occasionally (often?) you need pieces of wood cut to a certain diameter to fit inside a rocket tube of some various size. This router jig seems to work well for cutting any size ring (up to the max determined by how wide you make your guide strips). Some notes to keep in mind:
- Use this at your own risk - a router bit is very sharp and spins very fast - it would quickly turn fingers into a pink mist (red blood plus white bone)...
- The V on the back of the piece of wood is where your fingers are. You don't want them in front or the router may eat them. Even in back, you may get kick back and get them jammed a little if you're not careful, but it's better than cut off.
- There are two nuts on either side of the board that the allthread goes through. So you loosen the wing nut, adjust the all-thread to set your diameter and tighten the wing nut. Once tightened, you should be able to cut centering rings of a consistent size.
- Drill a 1/4" hole in the center of a square piece of wood slightly wider than the diameter you want to cut. I wouldn't recommend anything smaller than 1/4" - I had smaller screws bend when you're trying to push tight against the router bit, and the router kicks back...
- Basic operation is you put square piece with 1/4" hole onto center screw. Then slide it forward till it reaches the all-thread stop point. Then rotate it with your fingers on the back side of the V (away from the bit). Be careful - one rotation direction will work, the other rotation direction is VERY prone to kick back. You'll learn with the first piece...
Now the pictures:
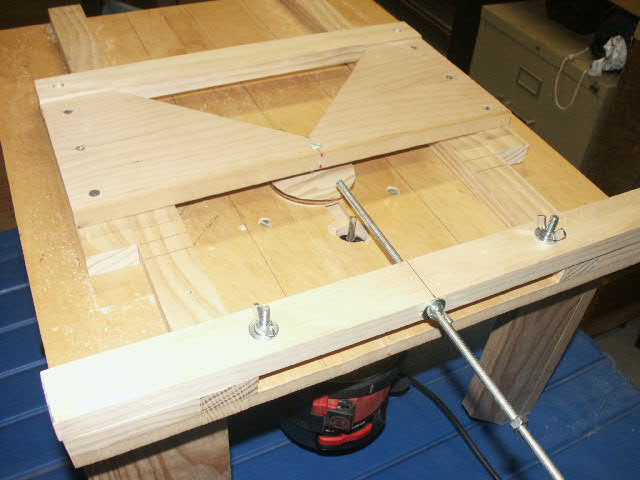
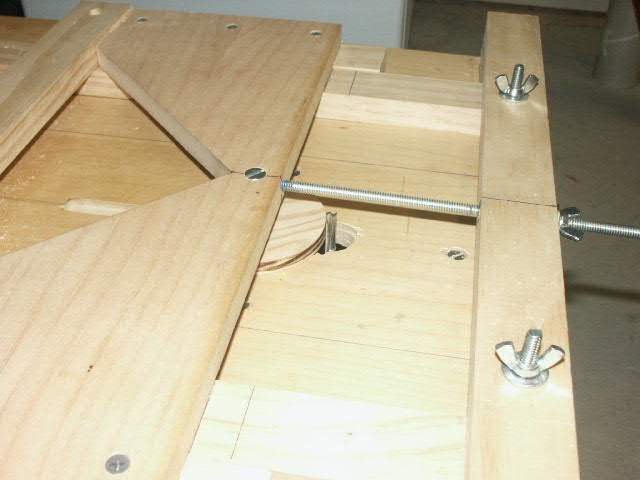
This is just your basic view. The allthread adjusts the diameter. The board on top with the V slides along the rails until it hits the allthread stop point. At that point, you can turn a square piece of wood held in place by the 1/4" screw (hard to see the screw here) and the router will make it round.
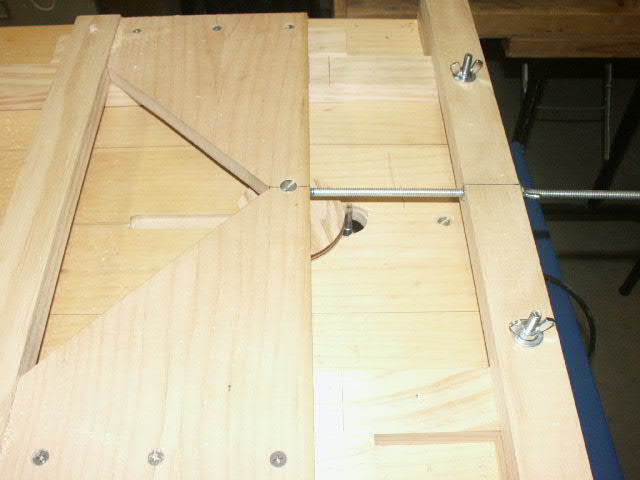
This is just the side view from above. The allthread is above the router bit. There are two nuts on either side of the board that the allthread goes through so that you can turn it back and forth. The allthread provides very fine adjustments to the diameter of the bulkhead.
Same as above except with the slide slid forward till it hits the allthread stop point.
Now in action (at least as much action as you can get with still photos....)
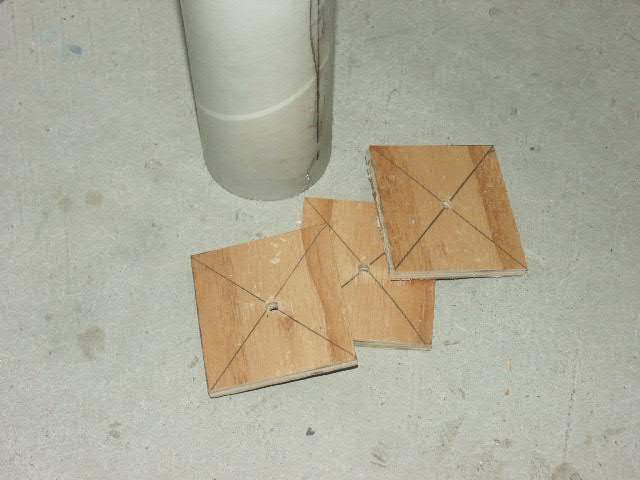
Step 1: Mark some blocks with approximate size that you need (can be as simple as drawing circles with the tube, or in this case making square 'blocks'.
Cut out the square blocks and mark the approximate center (again doesn't need to be exact yet). Then drill 1/4" holes in the approximate center.
[Optional] Use a sample bulkhead of the size you are making to set the allthread to the initial setting. If you don't use this optional step, simply start a little big and go through an iterative loop of shaving off a little and then test fitting it. Once you get a good fit, the allthread is set for you to make as many as you want.
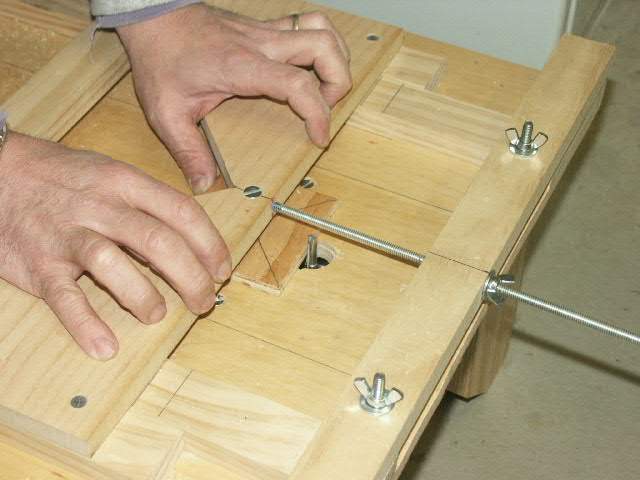
Now put one of your square pieces on the 1/4" screw. You will start the router and slide the 'Slide' (sorry, didn't know what else to call it...) up till it hits the allthread (the router should cut at least a little out at this point). [Yes, the router below isn't actually running - it was only a picture...]
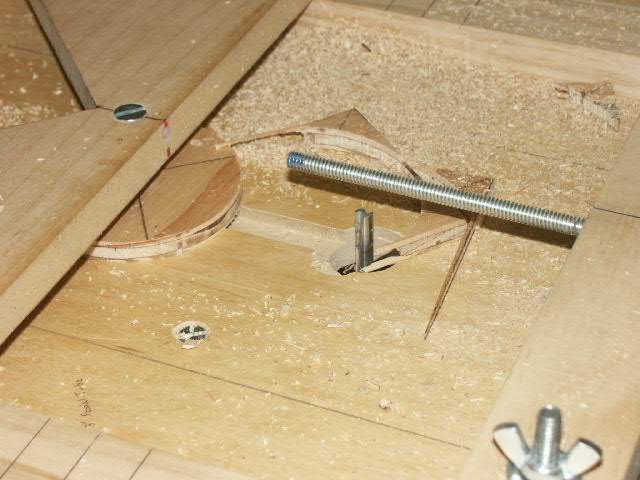
As you rotate the wood with your fingers ON THE SIDE AWAY FROM THE ROUTER BIT, the bit will trim off the edges making a circular piece.
When you have made a full rotation, you will have a circular piece of wood. You should test fit your first one, and adjust as necessary. Obviously, you want to start a little on the big side as you can always take off a little more, but you can't put it back. The primary task with bulkhead #1 is to get the allthread set to the right place to get the right size bulkhead. But generally this is a trim a little more each time proposition and not a make one, test it, throw it away, adjust the cutter, etc.
Once you get one just right, your allthread is set to the right distance to 'crank out' as many as you want.
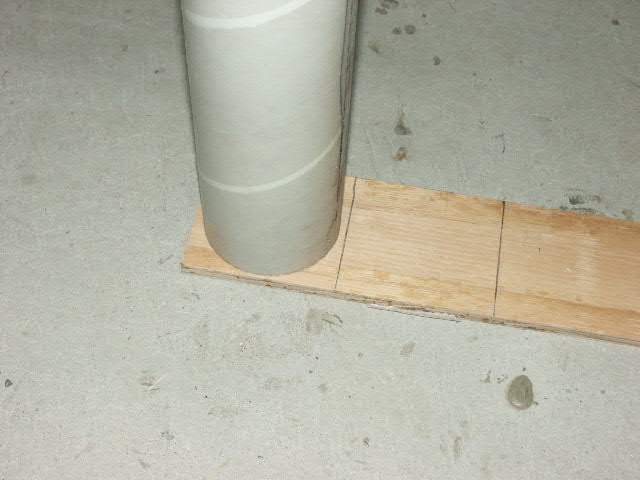
And they fit pretty nice!
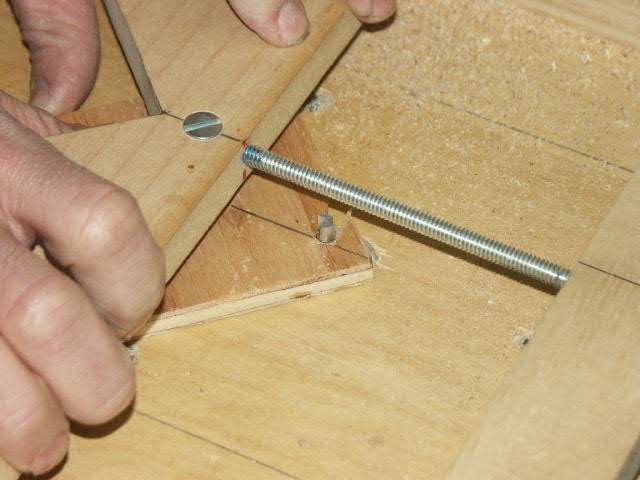
One final thing... If I were to change one thing, I would make the sliding table part be on the bottom with the screw pointing up. Why? Because you really don't have much space behind that V to turn a small piece of wood, and you will soon find your fingers in front of the wood trying to turn it (remember they're your fingers and your responsibility). Anyway, upside down with the sliding holder would allow you to put a shield over the bit easier, and still give you more room to hold. If this doesn't make sense, look at this picture and imagine how much more room I have to hold the piece of wood compared to the space provided through the V.
Finally, I would make some type of guard that is attached to the allthread itself so that as it is adjusted, the guard moves as well.
Now that you have nice bulkheads, go to the section on Centering Rings and see one way to cut out the inside circle.